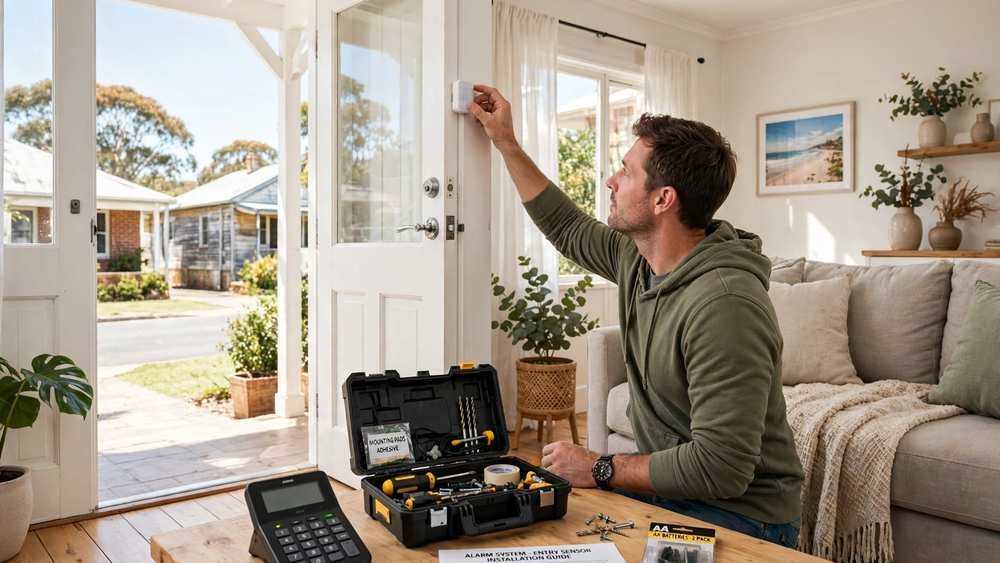
A DIY alarm system Australia households install themselves is not a lesser alarm. It is the same job — sensors on the openings, a hub in the middle, a siren when something trips — done with adhesive mounts and an app instead of a technician. What changes is who plans the zones, who sticks the sensors up, and who tests them afterwards.
This guide walks through the whole job in order: picking a kit that is actually on shelves in Australia right now, planning where each sensor goes, mounting and pairing them, and the test routine that catches mistakes before they become 2 am false alarms. Prices are Australian, checked on 12 November 2026. Our best home alarm system guide compares the panels.
What a DIY alarm system actually is
Four parts, no wiring. First, a hub: the small box that talks to every sensor and to your phone. Second, the sensors: entry sensors on doors and windows, motion sensors in the rooms, a keypad by the front door. Third, the app: it arms and disarms the system, tells you which sensor tripped, and adds users. Fourth, the power: sensors run on batteries that last a year or two, and the hub plugs into a wall socket. Our wireless alarm system guide compares the kits; this article covers fitting them.
What you do not get with a DIY kit is a person watching it: a self-installed system alerts you; it does not call anyone for you. If you want a control room in the loop, that is a monitored system — our alarm monitoring cost guide covers what monitoring adds and what it charges. A DIY kit can add monitoring later, but out of the box, you are the monitoring centre.
Pick your kit first: what is actually on shelves in Australia
Start with what you can buy today, not what a US review recommends. Ring Alarm and SimpliSafe are not officially sold in Australia: the Ring 5-piece kit is $199.99 in the US and about $509 through an import listing, which ships a US unit needing a step-down transformer, and SimpliSafe kits run $249 to $730 in the US. Buying either means grey-import warranty and a power adapter.
The kit most Australians actually buy is the eufy 5-in-1: HomeBase, keypad, motion sensor and two entry sensors for $349.95. It is the right kit at the right price — and it is sold out: Eufy Australia lists it at $349.95 with no stock, Supercheap Auto at $279.99 and out of stock, and Appliances Online at $344 and out of stock. If you find one in stock, buy it; if not, build the same system from the parts that are on shelves.
The in-stock alternative is the Orion Smart Alarm System Kit with Keypad at $215 from Bunnings: keypad hub, siren and camera unit, two motion sensors, two contact sensors and two RFID tags, on Wi-Fi with the Grid Connect app. It is a smaller ecosystem than eufy — fewer add-ons, no HomeBase-style local storage — but it is a complete kit you can take home today, and its add-ons are cheap: an Orion motion sensor is $19.98 and a contact sensor is $12.98 at Bunnings.
The third path is building from eufy add-ons: a HomeBase 3 at $377, an entry sensor at $48 and a motion sensor at $48, all in stock at Bunnings. That route costs more than the Orion kit, but it buys into the bigger eufy system of cameras, doorbells and HomeBase storage. For a house that will grow cameras later, it is the better buy; for a house that only needs an alarm, Orion is.
Two cheaper pieces fill gaps, not houses: the Swann Wireless Doorway Alarm is $49.95 at Bunnings, the Arlec 4-pack of magnetic contact alarms is $39.98, and the Arlec compact entry detector is $29.98. They suit a shed door or a single window, but they are not an alarm system — they make a noise and tell nobody.
DIY alarm system Australia: the install, step by step
Plan first, stick second. Walk the house with a notepad and mark every ground-floor opening — front door, back door, laundry door, garage-to-house door, every reachable window — then the rooms a burglar would cross to reach the valuables. That list is the sensor count: a three-bedroom house usually needs six to eight entry sensors and two motion sensors. Count before you buy, or you will be back at Bunnings mid-install.
Mount the hub next, before any sensor. It needs power and Wi-Fi, so put it near the router, not inside a metal cabinet or behind the TV — the signal to the sensors is short-range and walls eat it. Plug it in, connect it to the app, and update its firmware before you pair anything: a hub that updates mid-install drops every sensor you have just paired.
Pair one sensor at a time, in the room where it will live: scan its code in the app, stick it up, test it, then move on. Pairing in a pile on the kitchen table is how sensors end up assigned to the wrong room.
Mount entry sensors on the frame, not the moving part: the magnet on the door or window, the sensor body on the fixed frame, no more than a finger’s width apart when closed. Clean the surface first — dust is why adhesive sensors fall off in February heat. Motion sensors go in a corner at head height, facing across the room, not at a window or a heater.
Set codes and delays last: give every regular user their own code, set a 30-second entry delay on the front door and a 45 to 60-second exit delay, then arm it, leave, come back, and trip it on purpose. A system you have never heard go off is a system you have never tested.
Where each sensor goes
Entry sensors belong on every outside door and on ground-floor windows that open. Sliding doors need one sensor each, on the fixed side of the frame. If you have more openings than sensors, cover doors first: burglars use doors far more than windows.
Motion sensors belong where an intruder must walk, not where the family lives: a hallway sensor covers bedrooms and the front door, a living-room sensor the TV and the back door. Do not put one in a bedroom, facing a pet’s bed, a fish tank, or a curtain that moves in a draught. Pet-friendly sensors ignore animals up to a stated weight, but only if mounted at the height the manual states, usually around 2 metres.
The keypad goes by the door you use most. A second entrance you use daily — garage door, side gate — deserves a second keypad or a key fob, the cheapest upgrade a DIY system offers and the one most people skip.
The test that matters: false alarms
Most DIY alarm system Australia installs fail the same way: not by missing a break-in, but by crying wolf until the household stops arming them. In the first week, arm the system in stay mode and watch what trips it: the cat, the heater, a curtain in the sun, a loose sensor on a rattling door. Each trip has a fix — move the sensor, tighten the gap, turn pet-immunity on, or drop the sensitivity a notch.
Test every sensor once a month after that, with the siren and the app alert at the same time. Sensors run on batteries that fade slowly, and a sensor with a flat battery quietly stops reporting. Check battery levels in the app on the first of the month, the way you check smoke alarm batteries. A sensor that misses one monthly test is a sensor to replace, not to trust.
Keep a written list of what each sensor guards — when you sell the house or hand the system to a housesitter, that list is the difference between a working alarm and a box of blinking plastic.
Renters: what you can and cannot drill
A DIY alarm system Australia renters fit is the best case for DIY: adhesive mounts leave no holes, the hub plugs into a socket, and the kit moves with you. Nothing needs a drill — but check the lease anyway, because some forbid fixing anything to walls, and a keypad screwed to the frame counts.
Two renter rules. First, do not buy a system with a fixed panel or a wired siren. Second, keep the boxes: a $215 kit that moves house three times is cheaper than three $215 kits.
DIY alarm system Australia: what it costs
The honest total is the kit plus the sensors you need, not the headline kit price. The Orion kit at $215 covers two doors and two rooms; a three-bedroom house usually needs two or three extra contact sensors at $12.98 each, so budget about $240 to $255 all-in. The eufy 5-in-1 at $349.95 covered the same ground when in stock, while building from parts — HomeBase 3 at $377 plus sensors at $48 each — runs past $470. That is the price of the bigger eufy ecosystem, worth it only if cameras follow.
Compare that with the professional route and the DIY saving is the labour, not the hardware: a Bosch Solution 2000 fully installed is $1,020 from CTC Communications — panel, sensors, communicator and programming included. A DIY kit saves the fitting cost and the wait, but you do the programming yourself. If the house needs a wired panel, a hardwired siren, or sensors in a roof space, DIY is the wrong tool: pay the installer.
There is no monthly fee for a self-monitored DIY system — the app alerts are free. The cost that catches people is the second purchase: extra sensors, a second keypad, replacement batteries. Budget 20 per cent on top of the kit.
When to stop DIYing and call a professional
Four situations beat DIY. A monitored-alarm requirement — a commercial lease, a strata rule, an insurer demanding a graded system — needs a professional install and its certificate. A house with no reliable Wi-Fi needs a wired panel with a cellular communicator. A roof space full of insulation needs someone who has done it before. And if nobody in the house is comfortable with the app, do not buy a system that only works through it.
Frequently asked questions
What is a DIY alarm system in Australia?
A DIY alarm system Australia households fit themselves is a wireless kit — hub, entry sensors, motion sensors and a keypad — that you install with adhesive mounts and an app, with no wiring and no technician. It alerts your phone when a sensor trips, and it has no monthly fee unless you add optional monitoring later.
How long does it take to install a DIY alarm system?
A basic kit takes one to two hours for a small house: about 30 minutes to set up the hub and the app, then 10 minutes per sensor to mount, pair and test. A three-bedroom house with eight sensors is a Saturday afternoon, not a weekend project. Allow an extra hour the first time, because the first sensor always takes the longest.
Do I need Wi-Fi for a DIY alarm system?
Yes, for the app alerts and remote arming. The sensors talk to the hub on their own short-range wireless, so they still work if the Wi-Fi drops — but without Wi-Fi or mobile data, no alert reaches your phone. Some kits add a cellular backup; most budget DIY kits do not, so a dead modem means a silent phone.
Can renters install a DIY alarm system?
Yes. DIY alarm kits use adhesive mounts, plug into a socket, and move with you when the lease ends. Do not screw a keypad to the wall or fit a wired siren in a rental, and check the lease first — a few leases forbid fixing anything to walls at all.
How much does a DIY alarm system cost in Australia?
A complete kit starts at $215 for the Orion kit with keypad at Bunnings, and the eufy 5-in-1 kit is $349.95 when it is in stock. Most houses need two or three extra sensors, so budget $240 to $350 all-in for a three-bedroom house, with no monthly fee for self-monitoring.
Why does my DIY alarm keep false alarming?
The usual causes are a pet in a motion sensor zone, a loose entry sensor with too wide a magnet gap, a sensor facing a heater or a sunlit window, or a flat sensor battery. Check the magnet gap first, move the sensor away from heat and sun, and check the battery level in the app. If one sensor keeps tripping after that, replace it — a sensor that cries wolf is worse than no sensor.
Prices checked 12 November 2026 from Bunnings Australia, eufy Australia, Supercheap Auto, Appliances Online and CTC Communications. Planning figures, not quotes. External price source: GM Group Services back-to-base monitoring guide.